API KEYS / OPENAI
Get your OpenAI API key
About two minutes, four steps.
Only needed if you picked the API-key option in setup. API billing is separate from ChatGPT Plus.
- Create the account. Go to platform.openai.com and sign in (an existing ChatGPT login works — but the platform side is a separate product with its own billing).
- Add billing first. Settings → Billing → add a payment method and buy a small amount of credit — $5 is plenty to start. Without credits your key will exist but nothing will run. #1 tripwire.
- Set your budget. In Billing, set a monthly budget limit you're comfortable with, so the bill can never surprise you.
- Create the key. Click "API Keys" in the left sidebar, then "Create new secret key" (a Project key, the default tab, is the right kind). In the dialog, leave "Owned by" on You, name it "jarvis", leave Project on Default project and Permissions on All, then click "Create secret key". Copy the key immediately (starts with
sk-, shown only once).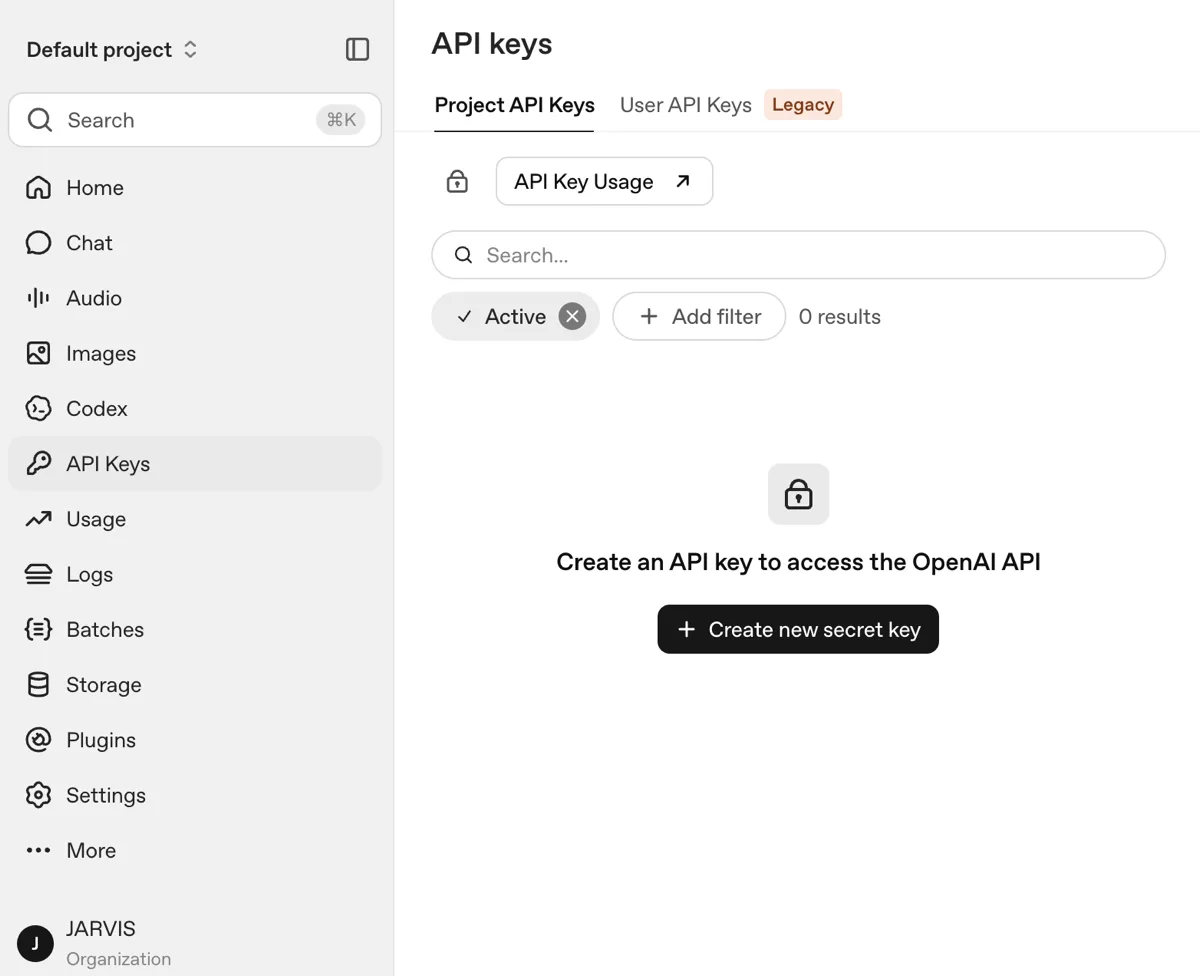
API KEYS — PROJECT API KEYS TAB 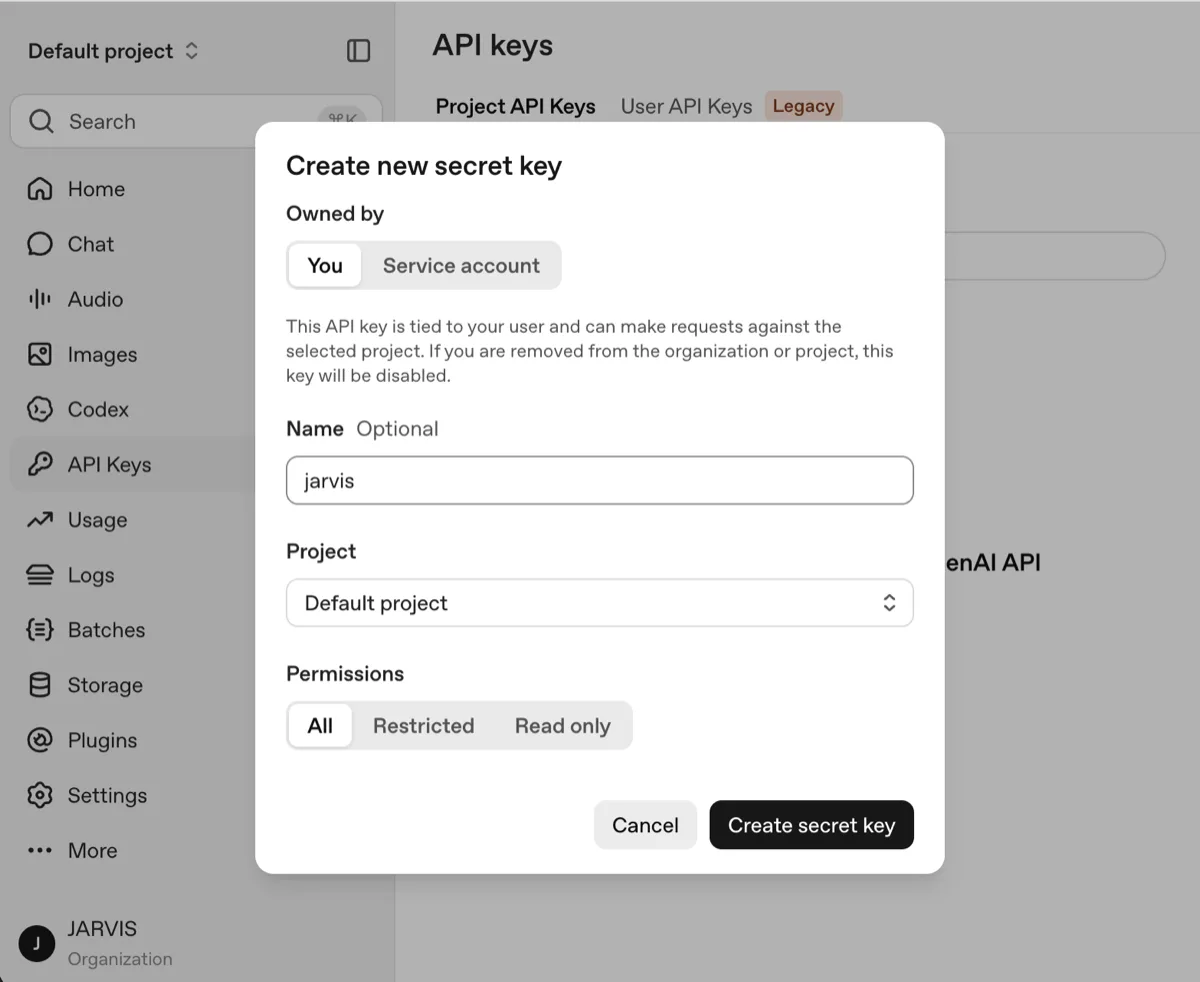
CREATE NEW SECRET KEY — DEFAULT PROJECT, PERMISSIONS ALL 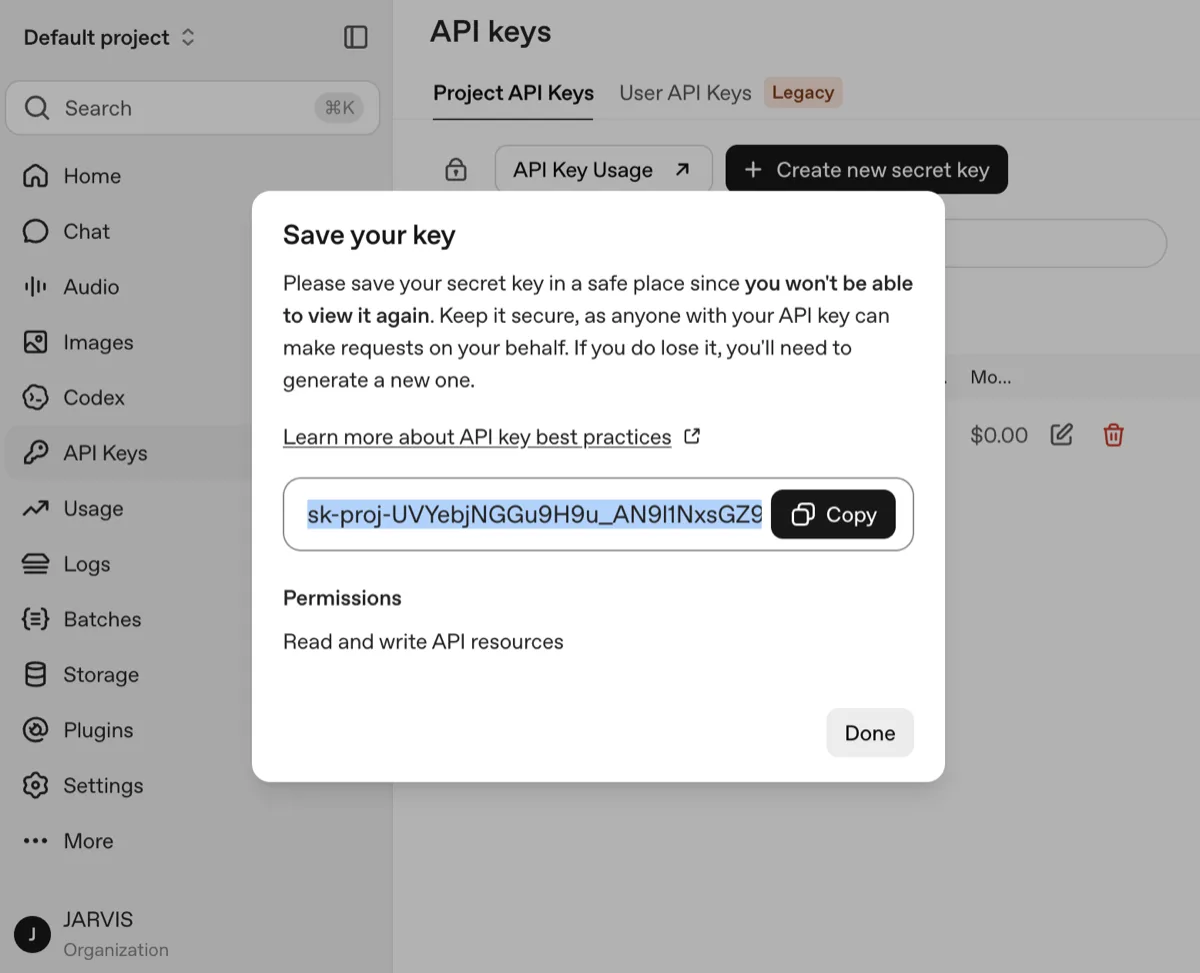
SHOWN ONCE — COPY IT NOW
Open JARVIS setup, pick OpenAI, and use the PASTE button to drop the key in.
If the wizard says the key doesn't verify: almost always missing billing/credits (step 2). Fix billing, then RETRY.
Stuck? Email jarvis.agent.tech@pm.me — a real person reads and answers.